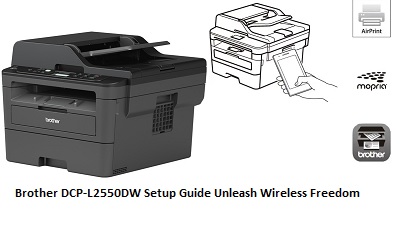
Brother DCP-L2550DW Setup Guide full-Discover the step-by-step instructions to effortlessly configure your Brother DCP-L2550DW Printer for wireless printing, liberating you from the confines of cables and unlocking wireless freedom.” Configuring the Brother DCP-L2550DW printer for wireless printing involves several steps, including connecting it to your Wi-Fi network and installing the necessary drivers on your computer. Here’s a detailed guide to setting up the Brother DCP-L2550DW for wireless printing:

Note: Before you begin, make sure your printer is turned on and within range of your Wi-Fi network.
1. Brother DCP-L2550DW Printer Setup Guide-Gather information:
- Know your Wi-Fi network name (SSID) and password (security key).
- Make sure your computer is connected to the same Wi-Fi network that you want to connect the printer to.
2. Set up the LCD control panel (on the printer):
a. Press the Menu button on the printer control panel.
b. Use the arrow keys to navigate to the Network menu and press OK.
c. Select “WLAN” and press “OK”.
d. Select “Setup Wizard” and press “OK”.
e. Next, printer will search for available networks, When your network is displayed, select it and enter your wireless password when prompted.
f. Once connected, the printer will display “Connected” or “Connected to [Your Network Name]”. Press OK.
3. Brother DCP-L2550DW Printer Setup Guide-Install the printer software:
a. Visit the Brother support website (support.brother.com) on your computer.
b. Enter your printer model (DCP-L2550DW) and download the complete driver package for your operating system (Windows or MacOS).
c. Run the installer and follow the on-screen instructions to install the printer driver and software.
4. Configure the printer on the computer:
a. During the installation, the setup program will ask you to select the connection type. Select “Wireless Network Connection”.
b. The installer will search for your printer on the network. Once found, select it and continue with the installation.
5. Brother DCP-L2550DW Setup Guide-Complete the setup:
a. Follow any additional on-screen instructions to complete the installation.
b. Test a print job to ensure that the printer is working properly.
Troubleshooting tips:
- Check the Wi-Fi signal: Make sure the printer is within range of your Wi-Fi network. Weak signals may cause connectivity problems.
- Reboot your router: If you are experiencing connectivity problems, try rebooting your Wi-Fi router to refresh the network.
- Check your credentials: Double check your Wi-Fi network name and password. They should have been entered correctly during setup.
- Firewall/antivirus: Sometimes firewall or antivirus software can block printer connections. If necessary, temporarily disable them during setup.
- Reboot the printer: If the connection is lost, restart the printer and run the Setup Wizard again if necessary.
- Static IP: You can assign a static IP address to the printer through your router settings to ensure it always has the same IP address.
- Driver Updates: Check the Brother website regularly for driver updates to ensure optimal performance and compatibility with your operating system.
By following these steps and troubleshooting tips, you should be able to successfully configure your Brother DCP-L2550DW printer for wireless printing.


